IBM i Access Client Solutions Inserting Colors

The first thing you are going to want to do is launch IBM i Access Client Solutions. Once the program is loaded, make sure you have a system configuration selected and launch the 5250 emulator.
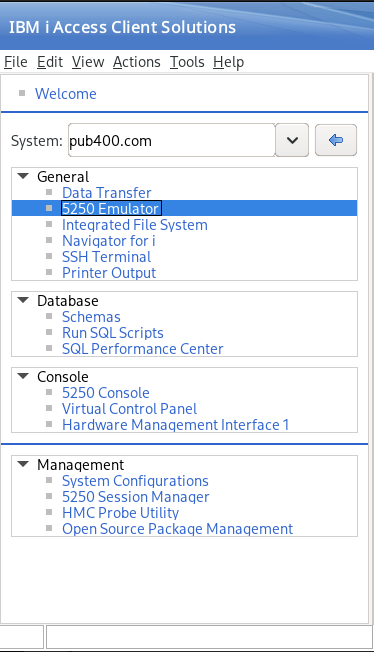
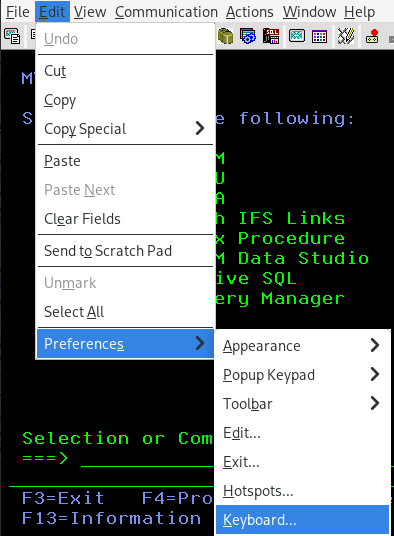
Once the emulator is launched navigate to the menu bar and select Edit > Preferences > Keyboard...
Under the Key Assignment tab, scroll down until you reach the list entries starting with QSN_SA.
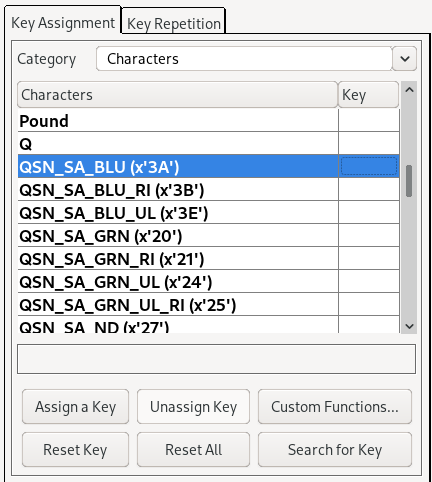
These are the color hex codes which can be inserted. See the list below for a more detailed look at each of the colors:
| Name | Hex Code | Description |
|---|---|---|
| QSN_SA_BLU | x'3A' | Blue |
| QSN_SA_BLU_RI | x'3B' | Blue Reverse-Image |
| QSN_SA_BLU_UL | x'3E' | Blue Underline |
| QSN_SA_GRN | x'20' | Green |
| QSN_SA_GRN_RI | x'21' | Green Reverse-Image |
| QSN_SA_GRN_UL | x'24' | Green Underline |
| QSN_SA_GRN_UL_RI | x'25' | Green Underline Reverse-Image |
| QSN_SA_ND | x'27' | Non-display |
| QSN_SA_ND_2F | x'2F' | Non-display 2F |
| QSN_SA_ND_37 | x'37' | Non-display 37 |
| QSN_SA_ND_3F | x'3F' | Non-display 3F |
| QSN_SA_PNK | x'38' | Pink |
| QSN_SA_PNK_RI | x'39' | Pink Reverse-Image |
| QSN_SA_PNK_UL | x'3C' | Pink Underline |
| QSN_SA_PNK_UL_RI | x'3D' | Pink Underline Reverse-Image |
| QSN_SA_RED | x'28' | Red |
| QSN_SA_RED_BL | x'2A' | Red Blinking |
| QSN_SA_RED_RI | x'29' | Red Reverse-Image |
| QSN_SA_RED_RI_BL | x'2B' | Red Reverse-Image Blinking |
| QSN_SA_RED_UL | x'2C' | Red Underline |
| QSN_SA_RED_UL_BL | x'2E' | Red Underline Blinking |
| QSN_SA_RED_UL_RI | x'2D' | Red Underline Reverse-Image |
| QSN_SA_TRQ_CS | x'30' | Turquoise Column Separator |
| QSN_SA_TRQ_CS_RI | x'31' | Turquoise Column Separator Reverse-Image |
| QSN_SA_TRQ_UL | x'34' | Turquoise Underline |
| QSN_SA_TRQ_UL_RI | x'35' | Turquoise Underline Reverse-Image |
| QSN_SA_WHT | x'22' | White |
| QSN_SA_WHT_RI | x'23' | White Reverse-Image |
| QSN_SA_WHT_UL | x'26' | White Underline |
| QSN_SA_YLW_CS | x'32' | Yellow Column Separator |
| QSN_SA_YLW_CS_RI | x'33' | Yellow Column Separator Reverse-Image |
| QSN_SA_YLW_UL | x'36' | Yellow Underline |
Select the 'Assign Key' button and enter a key sequence to register it.

You can now insert colors using your assigned key sequence. This works in the Source Entry Utility and also in the text field of members.
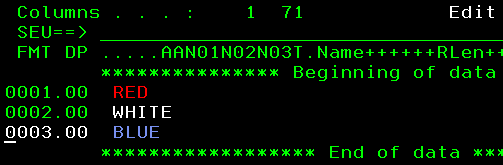

Note that the colors do take up one character of text and should only be used in the text field or in comments. You should now be able to insert colors wherever you please!